Here’s a detailed guide on how to grow #garlic on a #balcony:
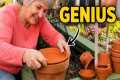
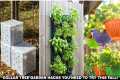
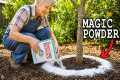
Step 1: Choose the Right Type of Garlic Softneck Garlic: Best for mild climates and produces a higher yield. Hardneck Garlic: Suitable for colder climates and has a stronger flavor. Step 2: Prepare the Garlic Buy Garlic: Choose organic garlic from a local market or seed garlic from a nursery (avoid grocery store garlic, as it might be treated to prevent sprouting). Separate Cloves: Gently break apart the garlic bulb into individual cloves without removing the papery skin. Step 3: Select Containers Use deep pots or containers (at least 8–10 inches deep) with drainage holes. Grow bags or recycled containers like buckets can also work well. Place trays underneath to catch excess water if needed. Step 4: Prepare the Soil Use well-draining potting soil mixed with compost or organic fertilizer. Garlic prefers soil with a slightly acidic to neutral pH (6.0–7.0). Step 5: Plant the Cloves Planting Depth: Push each clove into the soil about 2 inches (5 cm) deep with the pointed end facing up. Spacing: Space cloves about 4 inches (10 cm) apart to allow for growth. Cover with Soil: Gently cover the cloves with soil and pat it down lightly. Step 6: Watering Water immediately after planting to settle the soil. Keep the soil moist but not soggy. Water regularly, especially during dry periods. Step 7: Provide Sunlight Place the container in a sunny spot on your balcony. Garlic needs 6–8 hours of sunlight daily to grow properly. Step 8: Fertilize Fertilize every 2–4 weeks with a balanced liquid fertilizer or compost tea to promote healthy growth. Step 9: Care and Maintenance Weeding: Remove any weeds from the container to avoid competition for nutrients. Mulching: Add a layer of straw or dried leaves on the soil surface to retain moisture and regulate temperature. Inspect for Pests: Keep an eye out for pests like aphids and use organic remedies like neem oil if needed. Step 10: Harvesting Garlic When to Harvest: Garlic is ready to harvest when the lower leaves turn yellow or brown (usually 7–8 months after planting). How to Harvest: Gently loosen the soil and pull out the garlic bulbs. Curing the Garlic: Hang the bulbs in a cool, dry, and well-ventilated place for 2–3 weeks to cure. Step 11: Store and Enjoy Once cured, trim the roots and leaves. Store in a cool, dry place for long-term use. Pro Tips: Planting Time: Plant garlic in the fall for a summer harvest, or in early spring for a late-season harvest. Companion Planting: Grow garlic alongside herbs like basil or flowers to repel pests. Replanting: Save the biggest cloves from your harvest for replanting next season.